Photo. Kit Miller
Wednesday, 4 September 2019
Small Hand Stitched Books
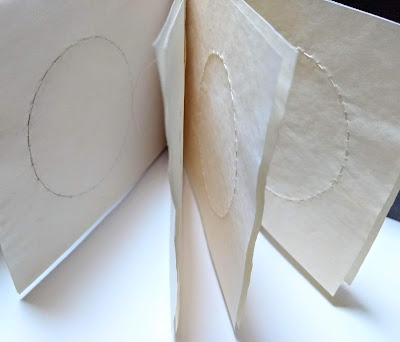
I have made quite a few small books over the years. Some are plain and some have stitched or printed pages. This one has a stitched circle of the same size and colour on each page.
Simplicity and repetition are fascinating to me. A minimal gallery space is not always the most interesting, but there is something quite delicious about almost not there.
The books made of rusted paper are a lot busier although I have added nothing to them. I rusted layout paper then soaked it in tea. The cover of this one is plain paper.
The paper was wrapped around tin cans using diluted vinegar. Using plain water does work but the process is longer and it seems to me that the colours are a bit duller. The longer the paper is left wet and exposed to the rust, the more fragile it becomes.
The paper is lovely to handle. It rustles like dry leaves and although thoroughly rinsed it sometimes retains a faint smell of rust.
Simplicity and repetition are fascinating to me. A minimal gallery space is not always the most interesting, but there is something quite delicious about almost not there.
The paper was wrapped around tin cans using diluted vinegar. Using plain water does work but the process is longer and it seems to me that the colours are a bit duller. The longer the paper is left wet and exposed to the rust, the more fragile it becomes.
The paper is lovely to handle. It rustles like dry leaves and although thoroughly rinsed it sometimes retains a faint smell of rust.
Wednesday, 24 July 2019
Woven Patchwork Square.
I wove strips of rusted, tea stained fabric and a cyanotype of leaves to create a patchwork square which measures about 19 cm across. The colour combination reminds me of dark wood and blue and white china, so rich and warm. There's something really relaxing about hand stitching. As with so many creative pieces, the process itself is as important as the end result.
I made a conscious effort to avoid a very neat finish, no straight lines drawn onto the cloth and only a couple of corrections to a misplaced stitch. A tendency to be too pedantic about the final piece means that my work is becoming increasingly tentative, which does not really suit me or what I want to say.
I made a conscious effort to avoid a very neat finish, no straight lines drawn onto the cloth and only a couple of corrections to a misplaced stitch. A tendency to be too pedantic about the final piece means that my work is becoming increasingly tentative, which does not really suit me or what I want to say.
Having woven the strips together I tacked them to a piece of old cotton sheet. This creates some weight and stability, while adding a third layer, which might be a bit bulky when it comes to joining squares together.
Back stitch and embroidery thread worked well with the colours and proportions of the squares. The frayed edges create a softer and flatter finish than if the fabric was folded or hemmed. I don't know how well this will wear over time.
Friday, 28 June 2019
Cyanotypes. Before and After
I exposed the fabric for a short while before laying the flowers in place. I'm not sure how much difference it made, but the intention was to have a slightly softer background, not just pure white.
The flowers were sandwiched between the fabric and glass to keep them flat and still.
The sun is bright today but I left them outside for quite a while as I wanted the blue to be quite strong.
Monday, 24 June 2019
Tiny Views
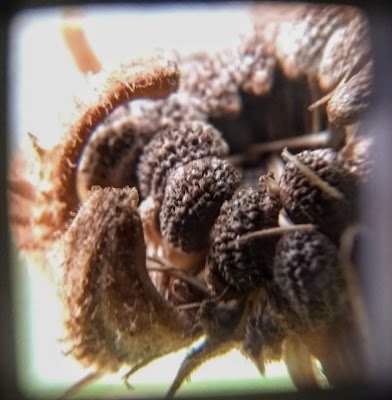
Apart from a little bit of editing such as slightly lighter or sharper on a few of them, the images are in their original state. The black frame, which has been cropped down, is the edge of the eye piece. Holding the lens in place was a bit tricky though, which is why some of them are slightly crooked. It was such fun that I have taken more than 50 of these photos.
Sunday, 23 June 2019
Cyanotypes on Fabric
New chemicals came in the post and the weather was clear and sunny, so obviously I had to experiment with cyanotypes. I pasted thick solution onto plain fabric and left it in the sun, which lead to a slightly blotchy effect. Carrot leaves under glass made a lovely mask on some pieces.
The thing that I was most keen to try was cyanotype on rusted tea stained fabric. The colour does not always turn out well. Sometimes they just look murky and rather dull, however there were a few samples where the colour was lovely. More practice is needed to get the combinations right.
I was hoping that some of the pieces would be suitable for making fabric mushrooms and I think there are a few that will serve that purpose well.
Monday, 10 June 2019
8mm Stills
Here are a few quirky images taken from old 8mm cine films that date from the late 1960s and 70s. My mother attached a clicker to the cine camera which meant that we could take thousands of still images.
 .
.
Some of them are much clearer than this but I have selected a few of the more interesting ones that have changed as a result of age or damage.
I cannot credit anyone as the photographer for any of the images as several family members would use the camera, even the children. In fact I should say especially the children, which made for some particularly interesting snapshots and snippets of film.

We now have a gadget that can capture and save them digitally, which is so much easier than looking at them through a magnifying glass against a bright light. Of course more importantly it means that the photos can be preserved and shared. Looking through the 20 or so rolls of film is quite time consuming but mostly fascinating, although it is always a bit sad when you find badly damaged strips.


 .
.Some of them are much clearer than this but I have selected a few of the more interesting ones that have changed as a result of age or damage.
I cannot credit anyone as the photographer for any of the images as several family members would use the camera, even the children. In fact I should say especially the children, which made for some particularly interesting snapshots and snippets of film.

We now have a gadget that can capture and save them digitally, which is so much easier than looking at them through a magnifying glass against a bright light. Of course more importantly it means that the photos can be preserved and shared. Looking through the 20 or so rolls of film is quite time consuming but mostly fascinating, although it is always a bit sad when you find badly damaged strips.


Subscribe to:
Posts (Atom)


